After the DNS has been configured, we are going to setup the shared hosting and for this we return to the client area.
Back in the client area, we continue to “My Products & Services” by clicking on the “Services”

Next you select the corresponding product by clicking on the “Active” button.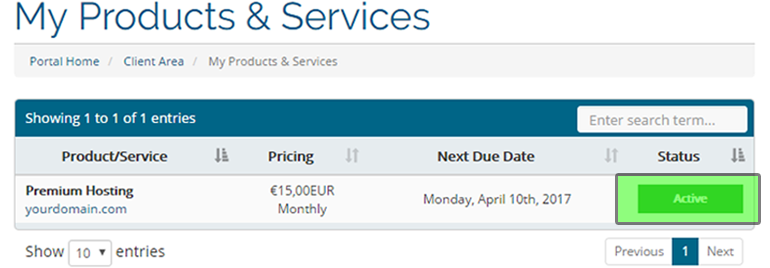
Click “Open Control Panel”, on which you will be redirected tot he Plesk Dashboard to setup the hosting for your domain.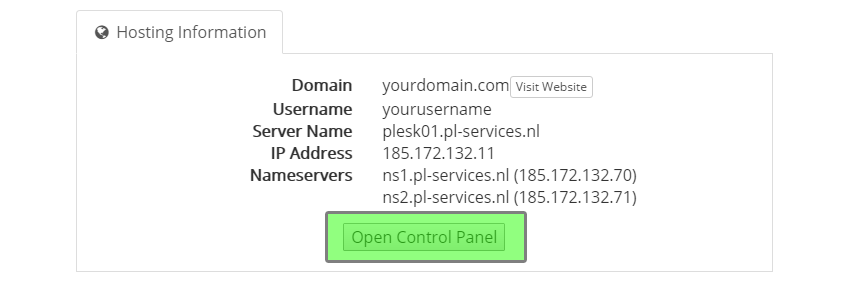
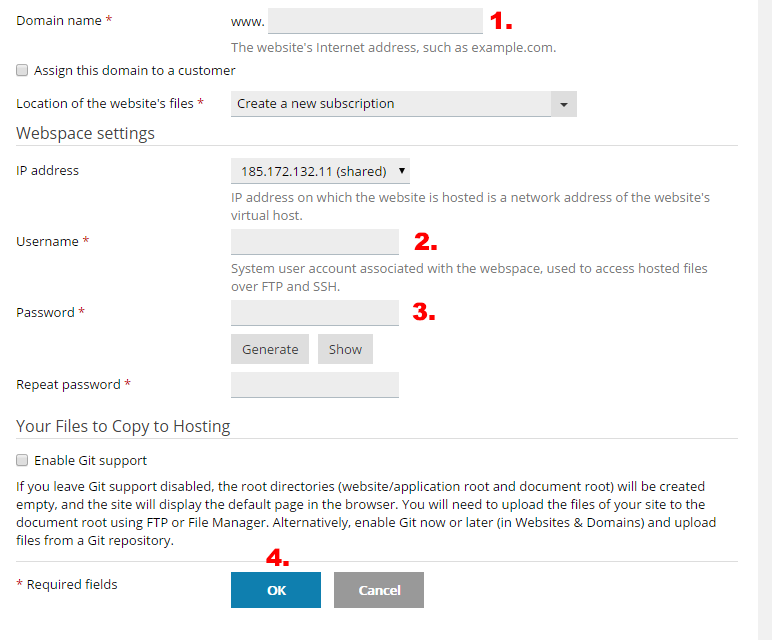
Since no domain has yet been added in Plesk, this will be the task we will perform before entering the control panel.
- Enter the domain name
- Enter a username
- Enter a password, we advice to click on “Generate”, so the system will automatically create a strong password for you, to reveal this password, you can click on “Show”. If you want to enter a custom password, make sure, you also repeat the password in the next field.
- Verify previous steps and click “OK”
If everything was entered correctly, you have just added a domain and set-up your shared hosting in your control panel!

